
Hello there!
As promised .. Here is the step by step guide on how to make the Minnie Mouse selfie board, like we did for Alyssa’s party. You can ofcourse adjust it to your party theme, all you have to do is get creative (with the help of Pinterest obvs!)
Tools:
- Poster board
- 3 A4 sheets of black paper
- Pritt
- Arts and Crafts glue
- Scissors
- craft glue
- blade
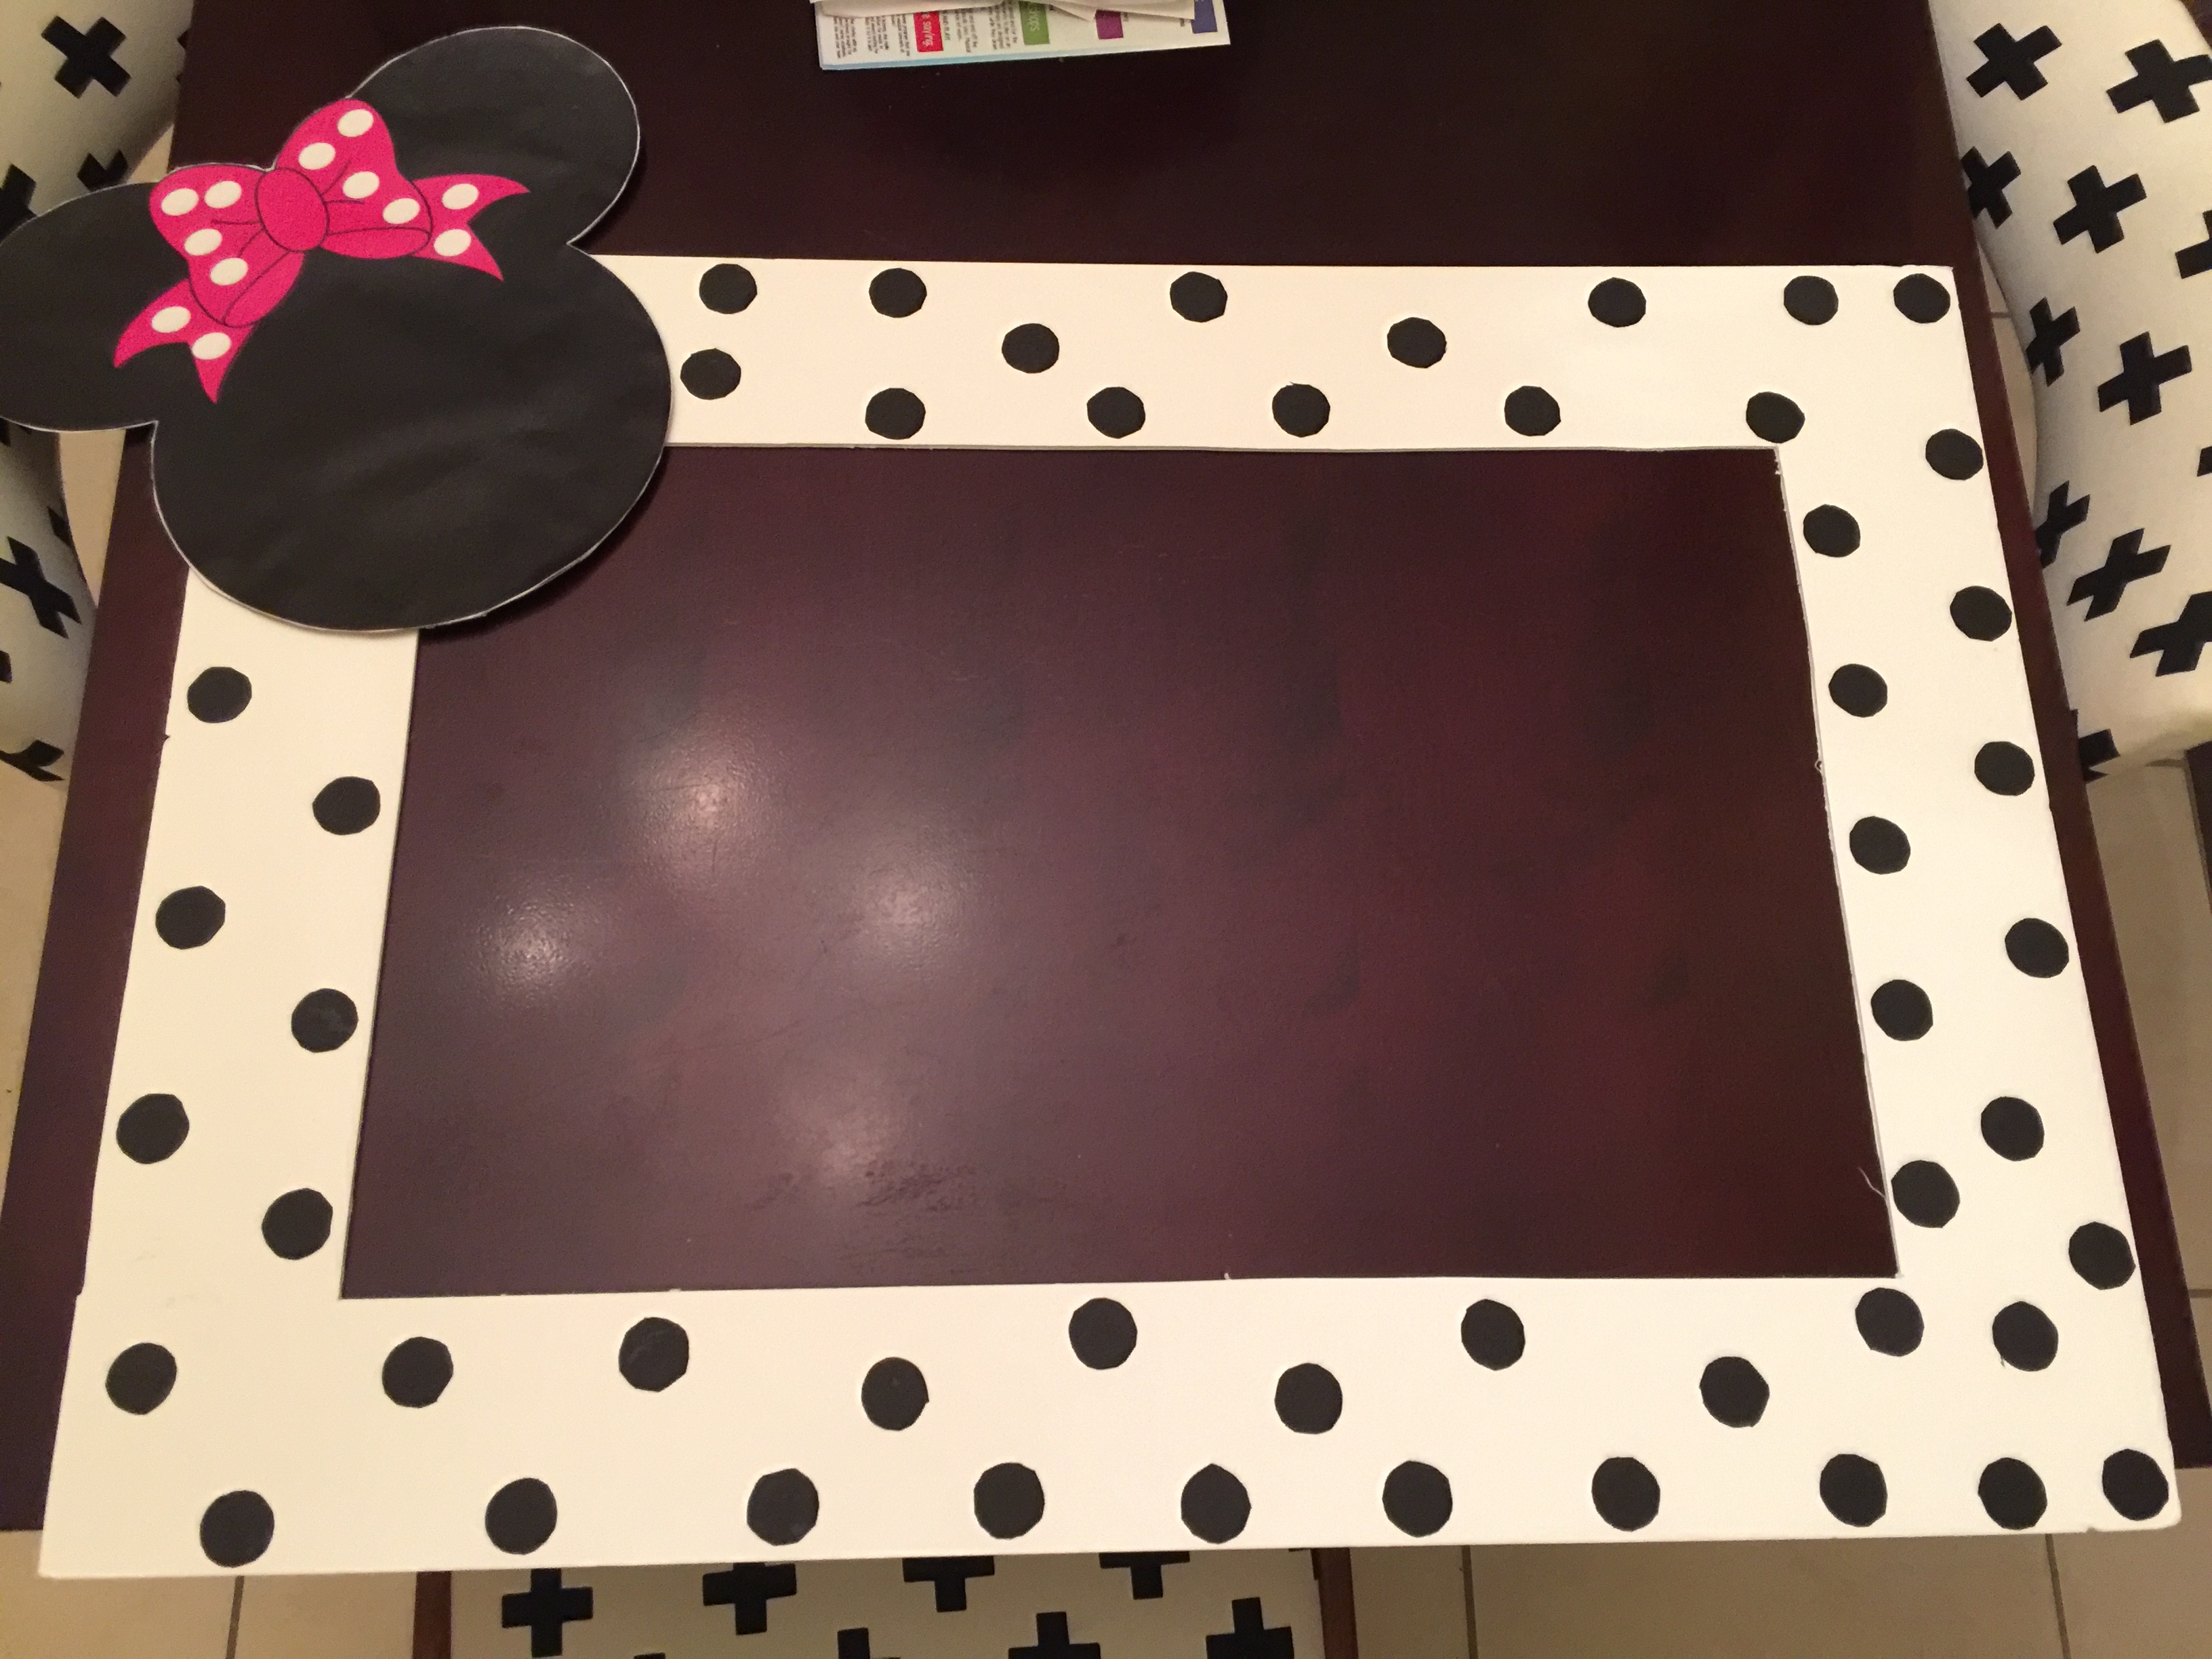
Step 1: Frame

Cut out the frame from the poster board Using the blade cutter, approximately 6cm wide.
Step 2: Black Circles
I used the lid of the pritt to trace circles on the paper – if you have a circle stencil… even better. Cut the circles out.

You can then glue it on randomly to the frame

Step 3: Mouse head
Print the below image on a A3 sheet of paper.

Cut out the mouse head and paste it onto the inner piece of the poster board which you cut out. Thereafter, cut the board following the shape of the mouse head.

Glue the mouse head board to the corner of the photo frame.
Using pritt, You can then add a face to the picture as I did with Alyssa’s picture.
And thats it!

Have Fun!